Pages

Showing posts with label Landscape maintenance. Show all posts

Sunday, October 16, 2016

Are you under or over watering your landscape plants?


Growing plants in the desert is challenging all the way around; from the heat to cold to minimal rainfall, getting plants to thrive can be frustrating. If you are puzzled as to how to tell if you are over or under watering your landscaping in the desert southwest, here are some guidelines.

It is frustrating to try and figure out what your plants want, as by the time they show symptoms in many cases, it’s too late to save the plant. Do not wait too long, however, or you may lose most of your plants.

Under and over watering symptoms often overlap, creating even more frustration. Evaluating symptoms carefully, however, will guide you in the right direction.

Under watering symptoms include loss of plant vigor, wilting, yellow leaves, leaf curling or drop, pest attack, stem and branch dieback and eventual death. Over watering symptoms include leaves yellowing, leaves smaller than normal, chlorosis (both iron and nitrogen), slow decline, soil-borne pathogens, and eventual death.

If your home was built within the past few years, chances are pretty good your irrigation timer is set for initial planting. After the first few months, the irrigation system should have been rescheduled. In this case, almost guaranteed your plants are being over watered. If you are a minimalist and either don’t have an irrigation system or try to water by hand, chances are pretty good you are not watering enough or deep enough.

Although desert plants are drought and low water specialists, most do need some periodic irrigation to look their best. Just don’t kill them with kindness (water).

Thursday, October 13, 2016

It's time to adjust your irrigation schedule


As we approach November, it’s getting close to time to reset irrigation controller. Why should you bother? Wasting water never makes sense. The average home in my community uses 200 gallons per day. It may not sound like much, but add that up over a year, and that’s 73,000 gallons. Forty percent of that is typically for outdoor watering. That’s nearly 30,000 gallons per year. With the water situation here at critical levels, it makes no sense to water plants when they don’t need it.

Days are getting shorter and cooler, so plants require less water. Irrigation of desert adapted and native plants can go to once a week starting in late October. For well-established native plants (at least 3 years old) you can back off to twice a month.

There is one caveat to this, however. The only way you can change your watering schedule is if you have been watering correctly from the start. This means deep watering so the entire root system gets a good soaking. If you have been engaged in shallow watering, the root system will not be as drought tolerant, and the plant may show signs of stress if you back off.

So how to change this? Start watering your plants deeply and slowly, and over a growing season (through next summer) you will be able to adjust your irrigation in the winter months to save water. The truth is, a vigorously growing landscape plant is not happier. Studies have proven moderately stressed plants, plants that are not watered and fertilized regularly, are less prone to insect pests and disease.


Sunday, September 25, 2016

Diagnosing mysterious plant problems


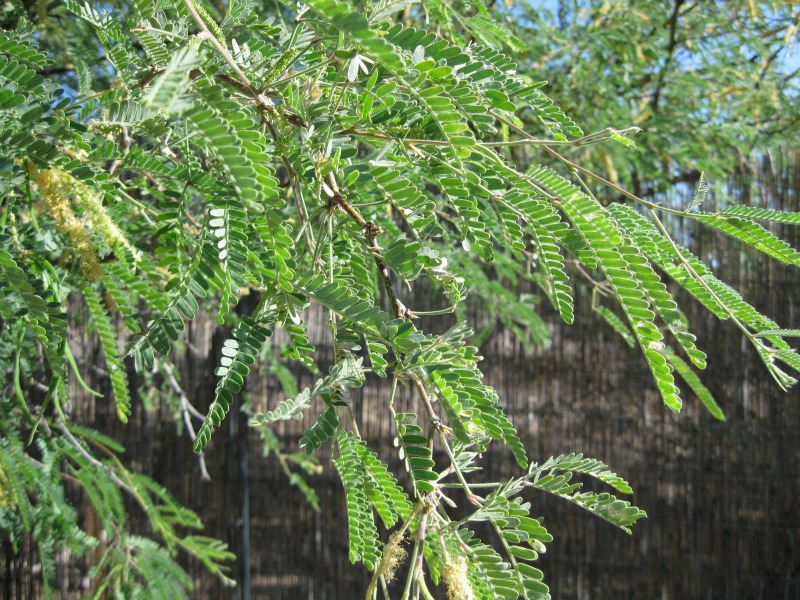
Velvet mesquite, one of our best native trees

Nothing is more frustrating than putting a lot of hard work and spending tons of time caring for landscape plants, only to have them succumb to some kind of disease or pest. If your plant is looking a little sickly, here are some common symptoms to look for to help you diagnose the problem, along with fairly simple solutions.

Is your plant wilting? Obviously, the first thing that comes to mind is lack of water. If you have ruled out your plant being thirsty, there are a number of other problems that can cause wilting. The reality is over watering can also make leaves wilt, because the roots are rotting. Make sure your plant is not getting too much water. The soil needs to dry out in between waterings so the roots can obtain oxygen. Yes! Roots need to be able to breathe.

Texas Root Rot is prevalent in the southwest, and causes significant root loss in short order. By the time you see wilting, it is dead. Plant resistant species, but never in the same spot. Which plants succumb to Texas Root Rot? Here’s a sampling:

Ash
Elm
African Sumac
California Pepper
Roses
Xylosma
Silk Oak
Bottle Tree
Roses
All stone fruit trees (peaches, plums and apricots)
All nut trees

Notice not one of those is a desert native. This is one of the many reasons why I recommend planting natives.

Some insects can cause wilting as they water out of the leaves. Look on underneath leaves for sucking insects like aphids and mites. If you see them, spray off with the garden hose. No chemicals needed.

What about leaf color changes that aren’t normal for the species? Are the leaves turning yellow? In some cases, this could be nitrogen deficiency. Planting natives usually means fertilizer is rarely warranted since they are adapted to the soil. If the plant is not a desert native, and the leaves are yellow with green veins, this is a sign of iron chlorosis, caused by a deficiency of iron in the soil, or by high pH soils. Soils with high alkalinity prevent the absorption of iron. Treating is expensive and labor intensive. It is better to choose plants that grow in alkaline soils.

Also keep in mind, that early leaf coloration is often caused by drought. Stick with desert natives with low water use requirements.

Is your plant just sitting there and not growing? One of the deadliest thing that can happen to your new tree is planting too deep. If the planting hole was deeper than the root ball, chances are it sunk into the hole and dirt has gathered around the trunk. You can try removing soil that is up against the trunk base. This might work, and worth a try. Next time remember to never dig a hole deeper than the root ball.

Many times plant problems arise because the species is not suitable for our desert climate and soils. Choosing desert native plants is a smart way to avoid many problems and have greater success with minimal effort.

Sunday, September 11, 2016

The challenges of desert soils


Our native desert willow is adapted to alkaline soil.
Whether you are a gardener or just love plants, you probably have heard the soils in most of Arizona are highly alkaline (High in pH.) So what does that mean to your garden and your choice of landscape plants? Plenty.

The most significant affect pH (which stands for potential hydrogen) has on plant growth is the availability of important plant nutrients. It’s not that these nutrients aren’t there, although is some instances that may be the case, but it’s that the pH affect the ability of plant roots to absorb the nutrients they need for adequate growth.

At one time experts thought adding soil amendments such as elemental sulfur or acids would alter the pH of desert soils. However, these additions proved to have little effect, if any.

So what’s a gardener to do? The most important thing you can do for your vegetable garden soil is to add compost. This will alter the soil by increasing moisture holding capacity, drainage and provide necessary nutrients for plant growth. However, this is much more difficult to do for landscape plants, since the amount of organic matter needed for a mature tree’s root zone would involve excavation of an area at least 5 feet deep and 2 to 3 times the height of a mature plant. That’s a whole heck of a lot of soil to treat!

In landscape situations, the best solution is to plant natives. Native plants have developed a tolerance to alkaline soils, and will thrive without soil additives.

Another challenge of desert soil is caliche clay. You’ll know you’ve got it if you can’t dig through it. Caliche clay isn’t just hardpan, and there’s plenty of that around, this impenetrable layer requires a jackhammer to remove. Not only will roots not grow through this clay, but water will not permeate either. If you find the layer in the uppermost part of the soil, abandon the spot and plant elsewhere, or in the case of a vegetable garden, use raised beds. If you are planting a tree or shrub and find the layer at the bottom of the hole, as long as you punch through so water can drain, you’ll be fine. However, if you find caliche in the root zone (1-3 feet down), or you can’t get through it, don’t plant there.

Sunday, September 4, 2016

10 top reasons to fire your landscaper


DO NOT let anyone prune your agave like this!

So you think your landscaper is doing a good job? Many people think as long as the person shows up, trims everything, rakes around the yard, and hauls trimmings away, they are doing a good job. Maybe. But if your landscaper is recommending any of the items below, it’s time to find someone else.

1.         They recommend topping your tree so it doesn’t block your, or your neighbor’s, views.

Nonsense! Topping does not only create rampant sucker growth, requiring even more pruning to keep it in check, but can lead to insect infestation, sunburn of exposed bark, disease, or even plant death. Not to mention how it will devalue not only your property, but your entire neighborhood’s home values. Don’t get me started as to how ugly this is, either.

2.         They shear your Texas Ranger shrubs into globes. Texas Rangers should never been sheared. Not only will all of the interior foliage die, but they are cutting off all of the lovely flowers. If the plant is too large for the space where it is planted, then take it out and plant either a smaller variety of Texas Ranger or a smaller plant. Period.

3.         They insist that snakes will live under your plants, and thus you must let them raise the plants off the ground: including cutting the leaves of agaves and desert spoons, effectively turning them into pineapples. This is ridiculous. We live in the desert, and so do snakes. Snakes are just as likely to curl up at your front door or under your car. The fact is: don’t stick appendages into places you can’t see.

4.         They recommend you feed your desert and desert adapted plants twice a year. Plants that are adapted to our desert soil rarely need fertilizer. In fact, if you feed plants in the legume family (and many of our desert plants are legumes), you will inhibit their natural ability to obtain nitrogen from the atmosphere. (Nitrogen fixation.) If your plant looks good, don’t feed it.

5.         They recommend dousing your agaves with poison to prevent the agave snout-nosed weevil from attacking your plants. Chemical insecticides are contact insecticides: which means you have to hit the bug with the chemical in order to kill it. Dumping poison on your plants to prevent the insect from doing damage does not work. It’s also wise to avoid using pesticides and insecticides at all, since they all end up polluting our groundwater.

6.         They tell you that if you let them cut the flower stalk off your agave, it will prolong its life. No, that is not true. Agaves flower at the end of their life cycle (about 30 years) and die. They will not live longer if you cut off the flower stalk.

7.         They offer to cut the arm off of your sahuaro because it is leaning and that will keep it from falling over. NO! Don’t do this. If your sahuaro is leaning, it could be because something is wrong with the roots. Make sure your sahuaro is NOT getting regular irrigation.

8.         If they tell you packrats will eat all of your flowers, don't believe them. Rabbits will, but packrats won't.

9.         If they insist covering your ground with landscape rock (gravel) will keep weeds from growing, they are wrong. It actually makes the weed problem worse because the seeds get trapped in the gravel where birds can't eat them.

10.     And last, but not least, they routinely cover your yard with Round-up weed killer. Don't let them do this! Round-up is poison. It ends up in your home, on your pet's paws, in your drinking water. Give them a hoe or tell them to use a vinegar and soap spray instead. It works, and is non-toxic.

Monday, July 4, 2016

Setting up drip irrigation to water your garden


I have found the most efficient way to irrigate my garden is with drip irrigation. It is efficient and easy to assemble.

To get started, you will need to select a supplier. Not all parts are interchangeable, so make sure you pick someone that you intend to stick with for a long time. It is pretty frustrating when you get all set up, only to find that when you need repair parts you can’t find ones that fit. 

Here is a list of supplies you will need:

Polyethylene tubing-1/2”
Elbows
T’s
Straight Connectors (also known as menders)
4 gallon per hour emitters
Tubing cutter
Hole punch
In-line valve
Flush valve
Heavy wire
Pliers
Battery Operated Timer (optional)
Gated Y hose bib (optional)

The quantities of everything you will need are based on how big of an area you are irrigating. Lay the plan out on paper so you have a pretty good idea of how much tubing, fittings, and emitters you will need. 

Assembling the system is quite easy. If your garden is fairly large, you will want to have each planting bed on a separate system, or at least install an in-line valve so you can turn one off while watering another. The system can lie on the ground as the polyethylene tubing is unaffected by sunlight. I use a gated Y at the faucet, too, to separate beds. Design your system so you have a flush valve at each bed to clean out calcium buildup. I also made mine so that each area was set up in such a way that I can fold back the entire layout when I need to rototill.

I always wire all connections together to make sure they do not come apart.  If you opt for the battery operated timer, you can run your irrigation in the very early morning hours, which reduces the changes of the fittings coming apart. Early morning is the best time to water as it reduces loss to evaporation and decreases the chance for the fittings to come apart since they expand in the heat of the day.

Space emitters 1 to 2 feet apart. You will be planting at each emitter, and not along the whole length of the line.